Buy your premium Sun-Maid + Orchard Choice Figs at valleyfig.com
Get 20% off Orchard Choice and Sun-Maid products with coupon code "20offretail". Limit one use per customer.
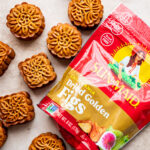
Golden Fig Mooncakes
Celebrate mid-autumn festival with Golden Fig mooncakes with pecans. Mooncakes are rich pastries filled with a sweet paste.
Servings: 12 (50g) small mooncakes
Ingredients
Mooncake Skin
- 1/3 cup golden syrup
- 2 TBSP + 2 tsp peanut oil
- 1 1/4 teaspoons lye water
- 1 cup all-purpose flour
Filling
- 3/4 cups pecans
- 3/4 cups Orchard Choice or Sun-Maid California Golden Dried Figs , roughly chopped
- 1/4 cup honey
- 2 TBSP coconut oil
- 2 TBSP cornstarch
- 1/2 teaspoon ground cinnamon
- 1/4 teaspoon salt
Other Ingredients
- 1 large egg yolk
- 3 TBSP whole milk
Instructions
Prepping the Skin
- Combine golden syrup, peanut oil, and lye water into a bowl. Mix until incorporated.
- Add the flour and combine until a soft dough forms. Place in an airtight container and let it rest in the fridge for at least 30 minutes.
- Next, add the pecans to a food processor and pulse until the pecans are coarsely ground.
- Add the roughly chopped figs, honey, coconut oil, cornstarch, ground cinnamon, and salt to the food processor. Pulse until everything comes together (~10 pulses).
- Place the filling in an airtight container and let it cool in the fridge for at least 30 minutes.
Forming the Mooncakes
- Once the ingredients are cool, take out your ingredients. This should include both your filling and skin.
- Using a scale, weigh out the ingredients for each mooncake. Place the filling onto the scale and adjust until it reaches 30 grams. Next, add some mooncake skin until the scale reaches 50 grams.
- After you have weighed out the ingredients for 1 mooncake, form the mooncake. Roll the filling into a ball. Set it on a plate.
- Next, roll the mooncake skin into a ball and flatten it into a thin disk. Enclose the filling with the skin. The disk won’t completely enclose the filling, so you’ll need to gently press the outside of the ball to stretch the skin over the filling. The motion you want to make is similar to how you would put a rubber band onto a ball or a cylinder (You roll your fingers over the rubber band until it reaches the position you’re aiming for). Once you get skin around the filling, roll between your hands to form a smooth ball.
- Repeat this process for every mooncake until you run out of filling or dough. Now it’s time to put them in the molds! Prepare a baking sheet by covering it with parchment paper. Make sure to have your molds ready.
- Coat the mold with a light layer of flour. Shake out the excess. This will help the mooncake to release easily from the molds.
- Place each mooncake into the molds and press down firmly onto the baking sheet. Next, lift the mooncake a little bit and push it out of the molds. Repeat this for every mooncake.
- Let the mooncakes chill in the fridge for at least 30 minutes to an hour (I like to chill mine for an hour). The purpose of this step is to make sure the pattern on top holds in the oven.
Baking the Mooncakes
- Preheat the oven to 350 degrees F (177 degrees C).
- Bake the mooncakes for 5 minutes.
- Make the egg wash by combining 1 egg yolk and 3 tbsp of whole milk. Whisk until smooth.
- Take the mooncakes out and brush them lightly on top with the egg wash.
- Put them back in the oven and bake for another 11 minutes.
- Cool them for 5 minutes on the baking sheet and then on a cooling rack to cool completely.
- For the best results, put them in the fridge to rest for 24 hours before eating.