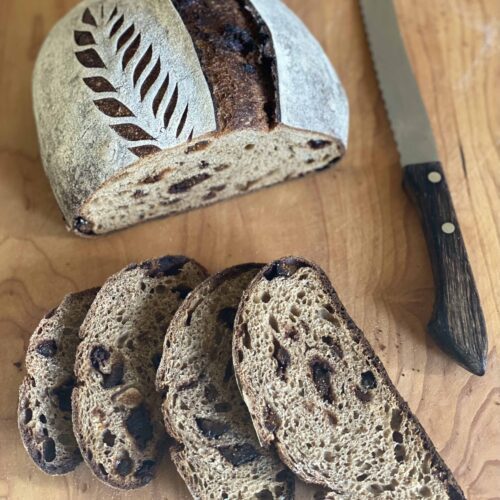
This uniquely savory sourdough whole wheat bread recipe made with buttery Khorasan/Kamut(R) flour combines the sweetness of onions with the caramel notes of golden figs. Thyme and black pepper provide a minty and sharp aroma that penetrates through the bread and compliments the richness of the onions and figs. Use a good quality extra-virgin olive oil to prepare the relish and avoid overly robust varieties that may come across as bitter in the baked bread. The resulting sourdough with whole wheat flour bread makes the most delightful grilled cheese (especially when made with blue cheese) and is an excellent host for roasted meats and peppery arugula.
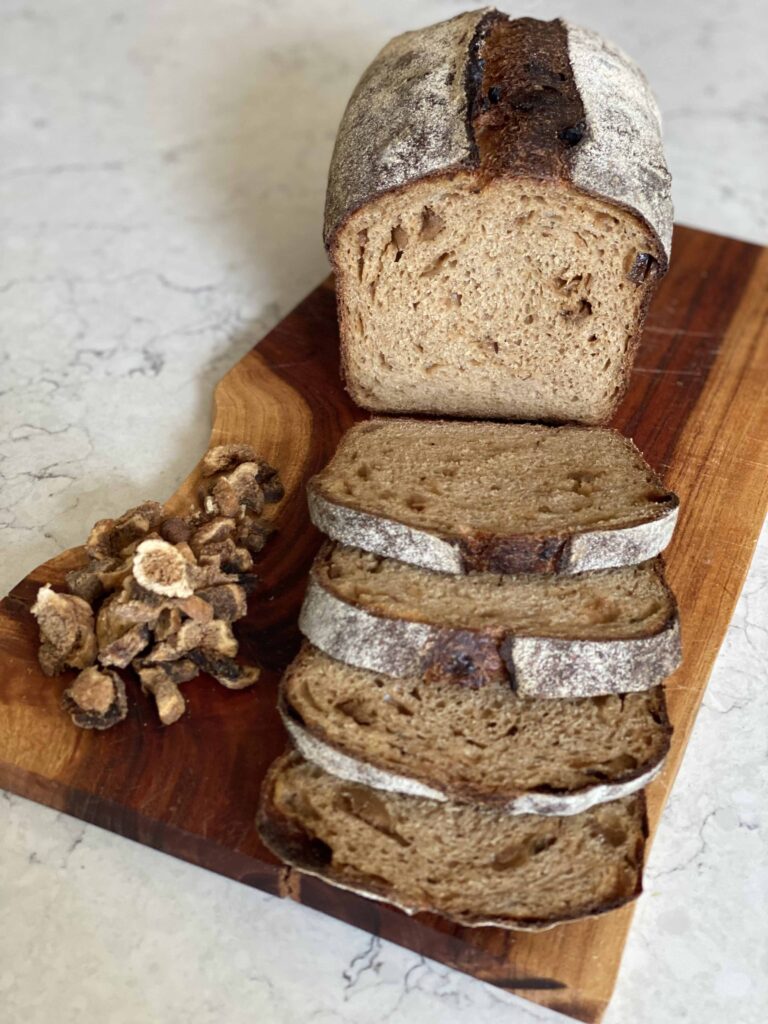
Fig Forward
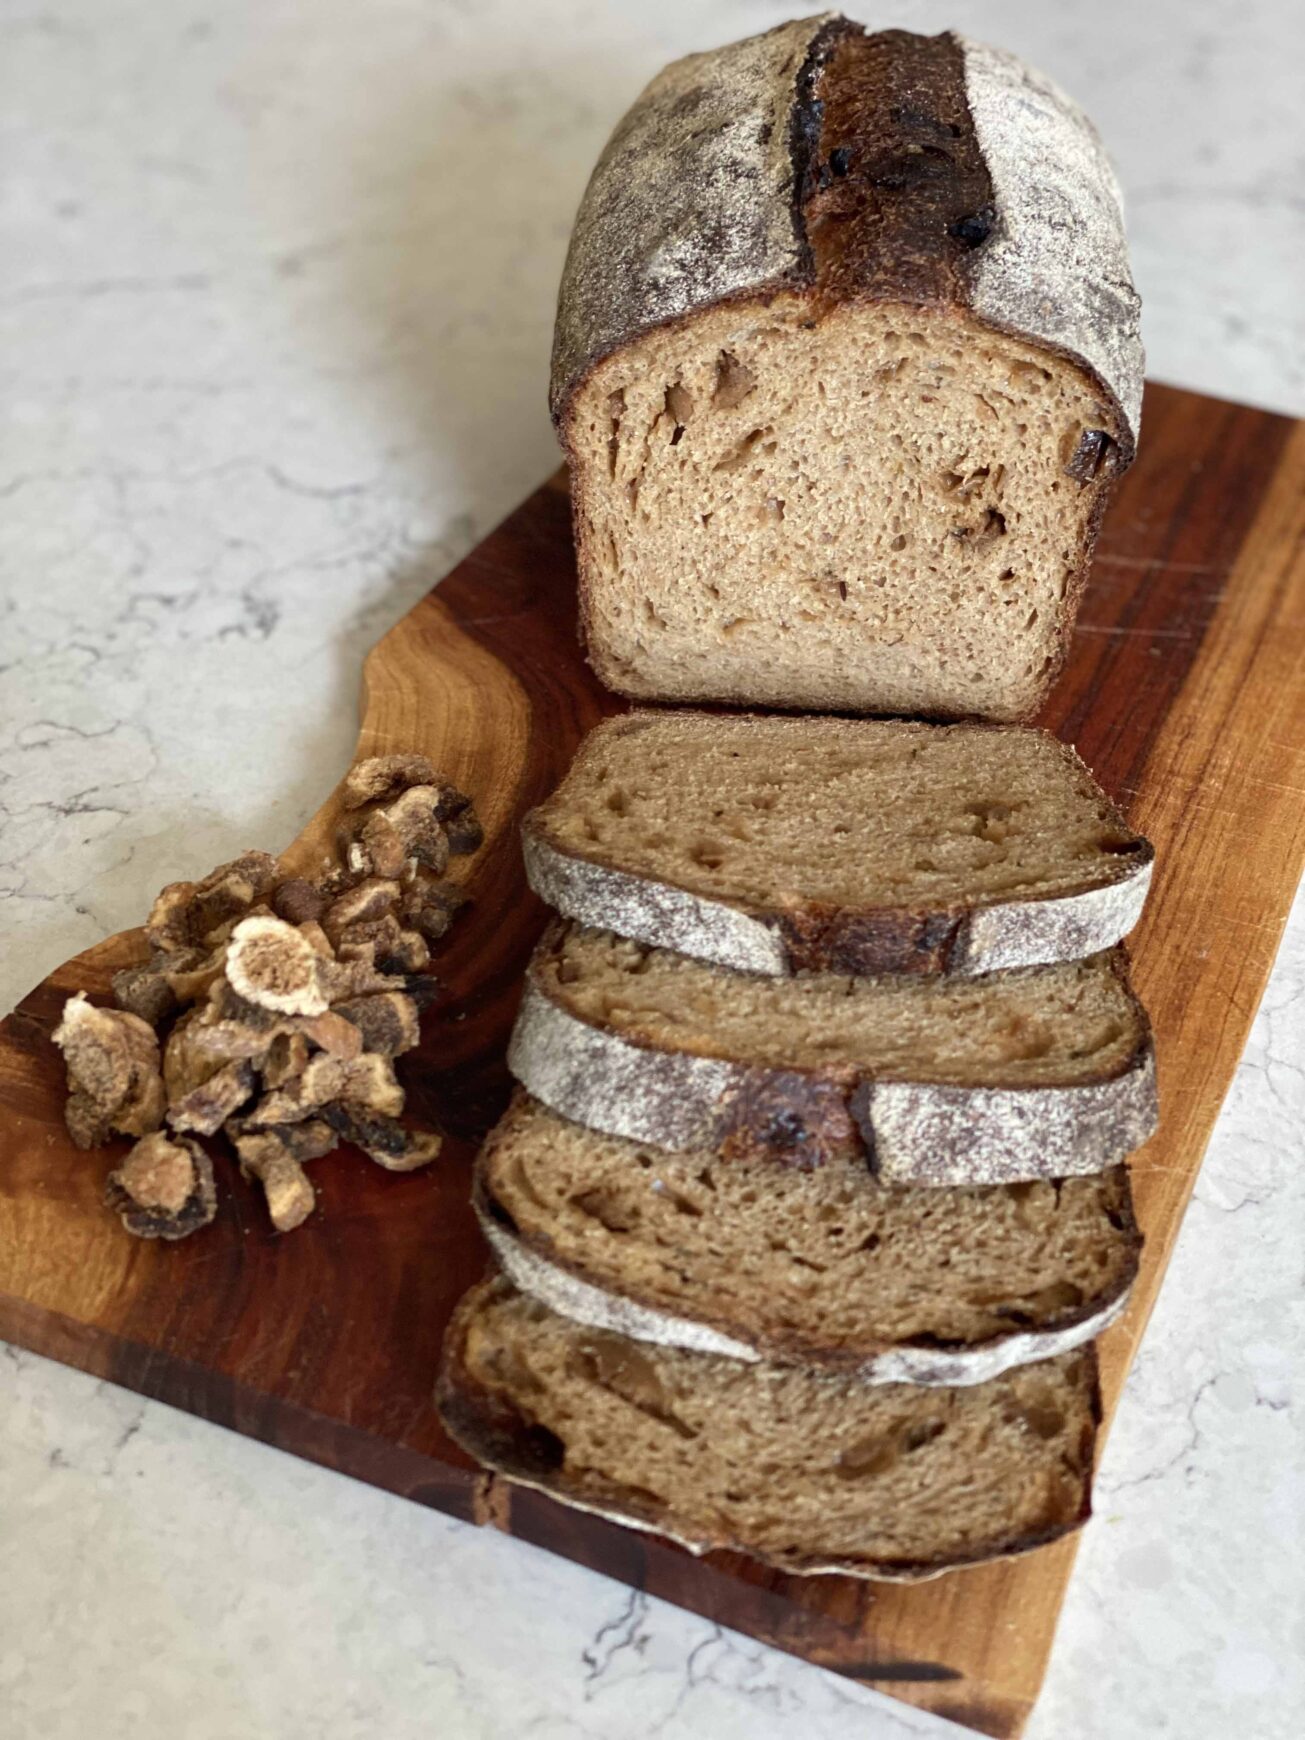
This sourdough with whole wheat flour uses fig ingredients in several different ways. Blue Ribbon California Diced Golden Figs cook and soften with onions for the relish that gets folded in the bread dough for texture. Blue Ribbon Fig Concentrate is mixed into the bread dough for color, flavor, and the natural sugars in the concentrate contribute to the fermentation of the bread too.
Flour Power: What to Use in Sourdough with Whole Wheat Flour
This formula was developed using Central Milling’s Old World Bread Flour and tested with a variety of different stoneground flours to provide the range of hydration noted below. Whole durum flour can be substituted for Khorasan/Kamut(R) and will provide a beautiful golden hue to the crumb.
Hydration Tips for the Sourdough Whole Wheat Bread Recipe
The overall hydration should be adjusted to the flours of your choice, using the instructions below as a guide. When fermentation is delayed using the bassinage method, water can be added in stages, allowing the dough to come together with greater strength and improved fermentation. If you do not keep a wholegrain sourdough starter, create a Khorasan/Kamut(R) or whole wheat leaven using 10% to 15% of your refreshed starter the night before mixing the dough. If wishing to retard these loaves in the refrigerator overnight instead of baking in the same day, reduce the starter or leaven from 25% down to 15%.
Fermentation: How Figs’ Natural Sugars Affect Bread-Baking
Learn more about fermentation for bread-baking and the naturally-occurring sugars in dried figs and fig concentrate.
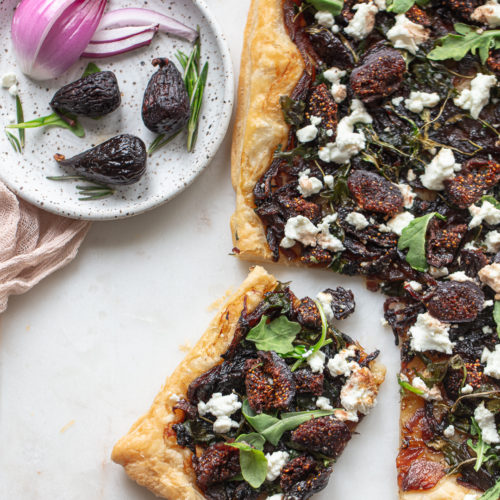
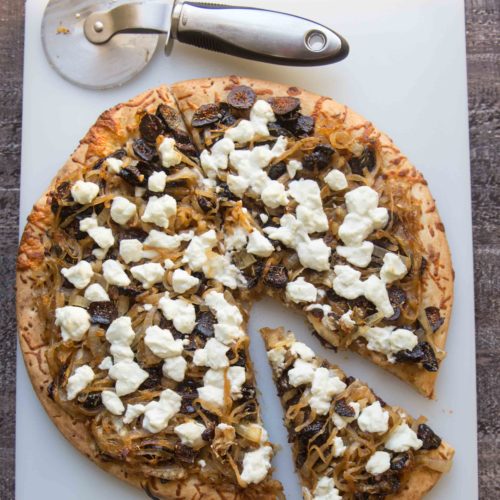
More Ideas for Fig & Onion Relish
The recipe for the relish below is enough to make seven loaves and can be stored in the freezer until ready to mix and bake the bread. It is also a delightful topping to focaccia, especially when sprinkled with sprouted quinoa that becomes slightly crunchy after being baked. Fig, Caramelized Onion, and Thyme Sourdough made with fig concentrate and chopped figs is sweet and savory, this loaf would likely be baked in a pan for open-faced sandwiches, an amazing grilled cheese, or toast points for a cheese board.
More Sourdough with Figs
While the loaf of bread below leans a little bit savory with the fig and onion relish, my sourdough whole grain bread with mission figs recipe is a classic, with sweet plump dried figs in it—a perfect addition for specialty loaves alongside olive bread or walnut bread.
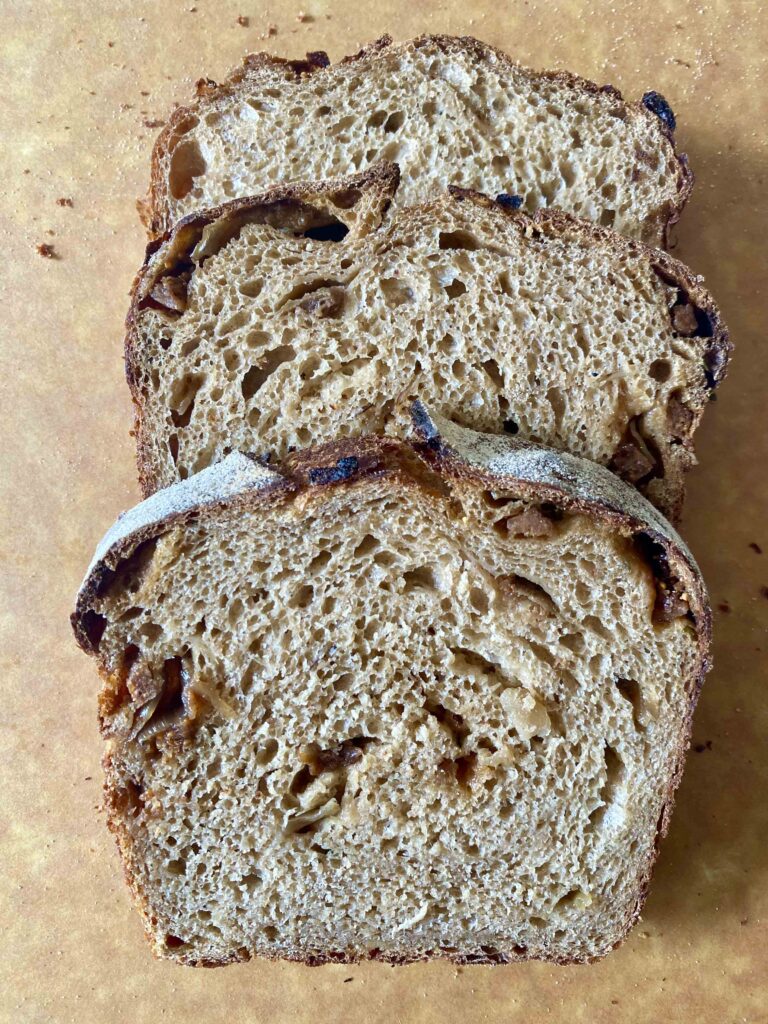
Fig Sourdough Whole Wheat Bread Recipe with Onions + Thyme
Equipment
- Dutch oven
Ingredients
Fig and Onion Relish
- 715 grams chopped yellow onion
- 75 grams extra-virgin olive oil
- 1 1/2 TBSP fresh thyme leaves (or 1 TBSP dried thyme)
- 1 teaspoon fine sea salt
- 1/2 teaspoon freshly ground black peppercorns
- 1/8 teaspoon grated nutmeg
- 300 grams (3/8-inch) diced Blue Ribbon Golden Figs
- 150 grams water
- 20 grams fresh lemon juice
Sourdough Bread (Baker's Percentage noted as BP below)
- 766-810 grams water 85 to 90% (BP)
- 50 grams Blue Ribbon Fig Concentrate 6% (BP)
- 450 grams high-extraction bread flour 50% (BP)
- 270 grams whole Khorasan/Kamut(R) flour 30% (BP)
- 180 grams hard red whole wheat bread flour 20% (BP)
- 226 grams 100% hydration refreshed wholegrain sourdough starter or leaven 25% (BP)
- 16 grams fine sea salt 1.8% (BP)
- 228 grams Fig + Onion Relish 25% (BP)
Instructions
Prepare the Onion Fig Relish
- Place the onions in a large, 14-inch heavy-bottomed skillet. Drizzle in the olive oil, sprinkle in the thyme, salt, pepper, and nutmeg, and toss to coat. Set over medium-low heat and bring to a sizzle. Cook for about 7 to 10 minutes, or until the onions sweat and become translucent. Turn the heat down to low and continue cooking, stirring occasionally. Once the onions evenly brown on all sides, increase the stirring to prevent scorching. After about 25 minutes cooking time, add the figs, water, and lemon juice and stir to combine. Continue cooking over low heat until the figs have mostly absorbed the liquid and the mixture has the consistency of a relish. Turn off the heat and transfer to a lidded container. Store in the refrigerator for up to one week before using or keep in the freezer for up to three months.
Mix and Autolyze (Rest) the Dough
- When the starter or leaven is almost ready, add 766 g of water into a large bowl along with the Mission Fig Concentrate. Stir to combine. Add the flours to the bowl and using your hands, mix and squeeze the dough in a circular motion until no lumps remain, scraping down the sides as necessary. If using a mixer, mix the dough to incorporation. The dough should be shaggy and somewhat loose. Cover and rest the dough for about 45 to 60 minutes, allowing the bran to hydrate and the dough to strengthen.
Perform a Bassinage, if Necessary, and Add the Leaven + Salt
- After the dough has rested, test to see how it reacts to a stretch-and-fold: wet your hands first to prevent the dough from sticking and gently slide your fingers under the dough mass. Release the dough from the sides of the bowl and gently bring it to the center. Rotate the bowl and repeat 3 to 4 more times until you have worked your way around the dough mass. If the dough feels stiff or wants to tear, add additional water in increments of 20 g at a time or around 2% if using a mixer. If the dough is pooling instead, or if you are still honing your shaping skills, do not add additional water. Keep in mind the dough should be somewhat loose at the beginning, but as bulk fermentation continues and you perform more folds, the dough will increase in extensibility and should become more balanced with elasticity, or the ability for the dough to hold its shape.
- Add the leaven and salt to the bowl at the same time you add more water, if using. This is the fun and messy-squishy part! If using your hands, mix and squeeze the dough vigorously to incorporate the additional ingredients. It will appear as if the dough has regressed to its original ‘shaggy mass’ stage but it will soon recover. If using a mixer, mix until the dough shows signs of strength,continuing until the surface of the dough no longer appears slick, the leaven is completely incorporated, and the salt has evenly and fully dissolved into the dough. Cover the dough or if using a mixer, transfer to a container with a lid. Rest the dough for 15 to 20 minutes.
Fold in the Fig and Onion Relish
- Evenly sprinkle one-third of the relish over the bowl, spreading or smearing it lightly into the surface of the dough to break up any clumps. Wet your hands first to prevent the dough from sticking and gently slide your fingers under the dough mass. Release the dough from the sides of the bowl and gently fold it to the center. Rotate the bowl and repeat three to four more times until you have worked your way around the dough. Repeat this process of incorporating the relish twice more, allowing the dough to rest for 15 to 20 minutes in between folds.
- Cover the bowl and bulk ferment for about 2 ½ more hours at room temperature (about 70 to 75°F). During this time, perform the stretch-and folds every 30 to 45 minutes.
Pre-shape the Dough
- Shaping is done in two stages at the end of bulk fermentation: pre-shape with a short bench resting period followed by a tighter final shaping. Using a bowl scraper, swiftly remove the dough from the bowl and transfer to a lightly floured surface. Using a bench knife, divide the dough into two pieces. Gently pat one piece into a rectangle. Roll from the top down, loosely tucking as you go. Repeat with the second piece. Cover both with a dry towel or stiff, reusable plastic bag and bench rest for 10 to 15 minutes, or until the dough visibly relaxes.
Final-shape and Final Proof the Loaves
- Grease two 9 x 5 x 2 ¾ -inch baking pans with butter or non-stick spray. Using a bench scraper, swiftly release the first piece and turn it over onto a lightly floured surface, seam side up. Repeat step #5, being mindful of gaining more tension with each movement. If the dough feels slack, it may benefit from stitching the dough together toward the middle to create more tension. Seal the final seam with a tuck of the bench scraper while simultaneously releasing the loaf from the work surface. Snuggle the loaf, seam side down, into a prepared pan. Repeat with the second loaf. Cover the pans with a dry cloth and a reusable plastic bag and set aside to final proof at room temperature, about 4 hours at 70°F. Because of the whole grain flours, this dough may progress quickly. Always watch the dough rather than the clock! The breads will be ready to bake when they have crested the sides of the pan and appear puffy and domed. When ready to bake the first loaf, place the second one into the refrigerator to prevent it from over-proofing.
Preheat the Oven
- Place a Dutch oven with its lid (large enough to fit the pans) on the middle rack. Preheat to 480°F for 30 to 45 minutes. Alternatively, preheat a shatter-proof roasting pan on the bottom rack. Fill one cup with warm water and set aside.
Bake the Loaves
- Score the length of the loaf ¼ -inch deep with a razor blade, or as desired. Carefully transfer it to the interior of the hot Dutch oven. Position the lid or, place both of the loaves on the middle rack and then carefully pour the cup of water into the preheated roasting pan. Bake with steam for 20 minutes. Remove the lid or the roasting pan if there is remaining water and lower the oven temperature to 460°F. Continue baking on the middle rack for 25 to 30 more minutes, or until the crust is a deep dark brown. This loaf prefers a long, slow bake for the custardy crumb to set properly. If baked too hot, the crust will darken considerably before the loaf is done. Adjust the temperature of your oven accordingly.
Cool and Slice
- Remove the loaf from the oven and cool completely on a wire rack before slicing, about 3 hours. Repeat with the second loaf if baking in a Dutch oven. Store the bread at room temperature wrapped in a beeswax-lined linen for up to 7 days.